
Accessing to your resources
In the previous tutorial we setup the environment to create infrastructure resources with code using Terraform.
We created a EC2 instance in AWS and it was great but we have a problem, we don’t know where is our instance and we can’t access it.
The goal of this tutorial is show you how to provision the instance with your public key in the authorized keys to access through ssh without password.
The expedition to AWS. Security groups
EC2 instances are closed by default and we need to configure what ports are going to be open.
security_group.tf
resource "aws_security_group" "test-instance-sg" {
  name = "in-out-access"

  # SSH Access
  ingress {
    from_port   = 22
    to_port     = 22
    protocol    = "tcp"
    cidr_blocks = ["0.0.0.0/0"]
  }

  # HTTP Access
  ingress {
    from_port   = 80
    to_port     = 80
    protocol    = "tcp"
    cidr_blocks = ["0.0.0.0/0"]
  }

  # Server outbound communication
  ingress {
    from_port   = 0
    to_port     = 0
    protocol    = "-1"
    cidr_blocks = ["0.0.0.0/0"]
  }

  tags {
    Name = "test-instance"
    Project = "terraform-tutorial"
  }
}
Here we are configuring three rules:
The first one is to open the port 22 to access thought ssh to the instance
Second opens the port 80 to prepare the instance to work as a web server
Third one is an outbound communication rule where we specify the instance will be able to ping everywhere in the internet.
Same as in the first tutorial we continue adding tags to tracking our resources.
The expedition to AWS. Give me the keys
The next step is configure our access key in the instance.
key_pair.tf
resource "aws_key_pair" "my-test-key" {
  key_name   = "test-key"
  public_key = "${file("/root/.ssh/id_rsa.pub")}"
}
In this file we create an AWS key pair resource, the most important attribute is public_key.
Terraform has some basic functions in this case we are using file() function to specify we are using the content of the file as public key.
The expedition to AWS. Joining the pieces of the map
We already have our resources defined now is time to insert the new components in our instance definition.
main.tf
resource "aws_instance" "my-test-instance" {
  ami             = "${data.aws_ami.ubuntu.id}"

  instance_type   = "t2.micro"

  key_name        = "${aws_key_pair.my-test-key.key_name}"

  security_groups = [
    "${aws_security_group.test-instance-sg.name}"
  ]

  tags {
    Name = "test-instance"
    Project = "terraform-tutorial"
  }
}
To our previous main.tf file we are going to add two new properties:
key_name
Links the key pair resource provisioned with our public key.
security_groups
This attribute can receive multiple security groups(this is why the bracket syntax) but we are only setting our security group created with the in/out rules.
Bonus. The outpus
outputs.tf
output "server-ip" {
  value = "${aws_instance.my-test-instance.public_ip}"
}
Outputs in Terraform are one the ways to know information about of resources, here we are creating a reference to the public IP of the instance create, the values will be printed after the apply command.
Light it up
We are going to skip the terraform plan command but you should run it always to review your plan.
docker run -it --rm \
    -v $(echo $HOME)/.ssh:/root/.ssh \
    -v $(pwd):/data \
    -w /data \
    -e AWS_ACCESS_KEY=AKIAJMT3AEZIIW4WQ7ZQ \
    -e AWS_SECRET_ACCESS_KEY=V/rI9GwaCnuB+0xs1Zo9/FAMdgPq5jv63VdI0Ve/ \
    hashicorp/terraform:light apply \
    -var 'aws_access_key=AKIAJMT3AEZIIW4WQ7ZQ' \
    -var 'aws_secret_key=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'
This time we are going to add an extra line to run the terraform apply command.
With the -v flag Docker allow us mount a local folder in the container will be created to run Terraform commands.
We are replacing the .ssh folder of the root user in the container with the our local folder, when Terraform loads the content of the public key with the file() function it creates the key pair resource with the information of the host machine.
Jumping inside the pool
This should be the output, showing us the number of resources created and printing the IP generated for the instance.

Finally in order to test we access to the instance using ssh
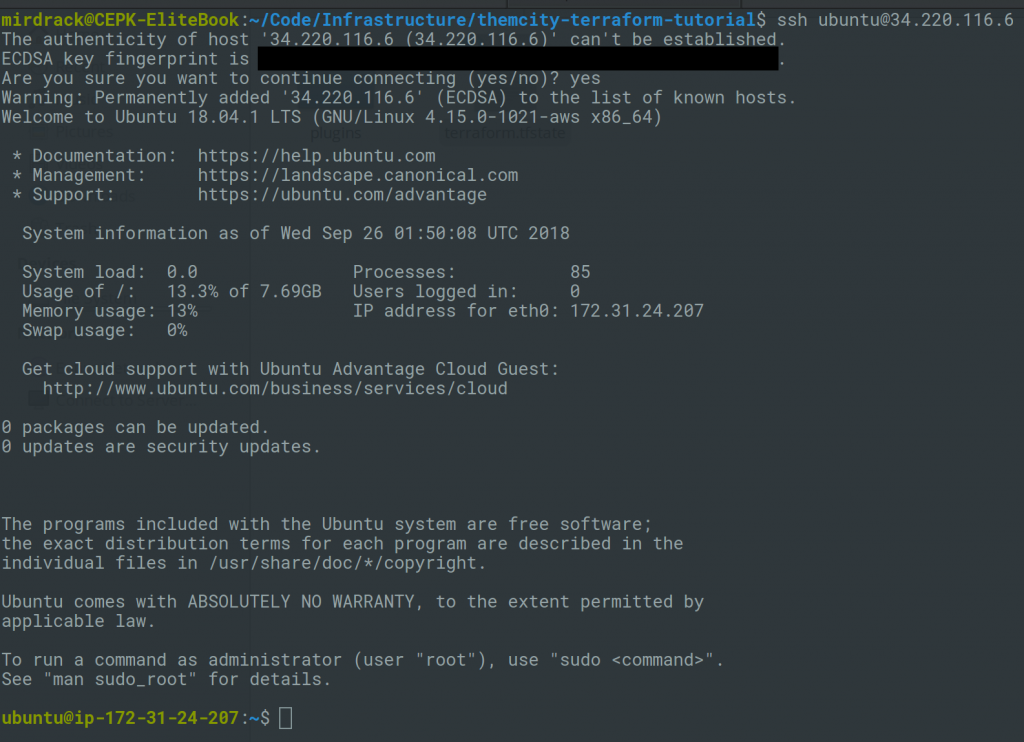
As you can see we can enter using ssh with the ubuntu user without password since we already load our public key in the authorized keys in the creation of the instance.
In the next tutorial we are going to provision the instance to install, configure and run Nginx.
Github repository
https://github.com/Mirdrack/themcity-terraform-tutorial
Photo by Collin Armstrong on Unsplash